Image to mesh
A practical way to learn how to convert image to 3d model in blender
To learn how to convert image to 3d model in blender, start by treating the picture as a reference, not a complete set of measurements. This guide walks through a simple object with a clear outline, then shows how to add depth, inspect the unseen sides, and fix common mesh problems.
Prerequisites
Gather a usable reference and choose a modest first project before opening Blender.
Numbered steps
Use this three-stage workflow for a simple prop, silhouette, or bust. Save a new Blender file before you begin so the reference and modeling decisions stay together.
-
1
Place and align the reference
Choose a sharp image with a readable outline and little perspective distortion. In Blender, switch to Front Orthographic view with Numpad 1, then add the picture through Add, Image, Reference. Move and scale it until the object is centered near the scene origin. If the object is photographed at an angle, do not trace it as though it were a straight-on elevation: perspective changes apparent widths and makes the eventual mesh look lopsided. Keep the reference visible while modeling, but avoid mistaking pixels for reliable dimensions.
-
2
Build a coarse mesh
Add a cube, plane, or other primitive that roughly matches the object's mass. In Edit Mode, move vertices to match the large outline first; use extrusion to give a flat silhouette depth. For a roughly symmetrical object, model one side and use a Mirror modifier, checking that the center vertices meet cleanly. Work from broad volumes toward small features rather than outlining every color change in the photograph. Rotate into side and perspective views often: the front reference can look convincing even when the mesh has almost no believable depth.
-
3
Refine and inspect the result
Adjust thickness, slopes, and the back of the object using additional views or reasonable assumptions. Add supporting geometry only where it improves the shape. Apply smooth shading if appropriate, then check whether sharp edges need to remain sharp. In Edit Mode, select the mesh and recalculate normals with Shift+N if faces shade unexpectedly. Inspect the model from all sides, check its scale and origin, and save the Blender project. Before exporting, decide whether the destination needs geometry alone or also materials and textures; those are separate checks.
Common errors and fixes
A strong front-view match is only the first test. Compare the reference with the modeled result, then turn the model to expose problems the original picture cannot show.
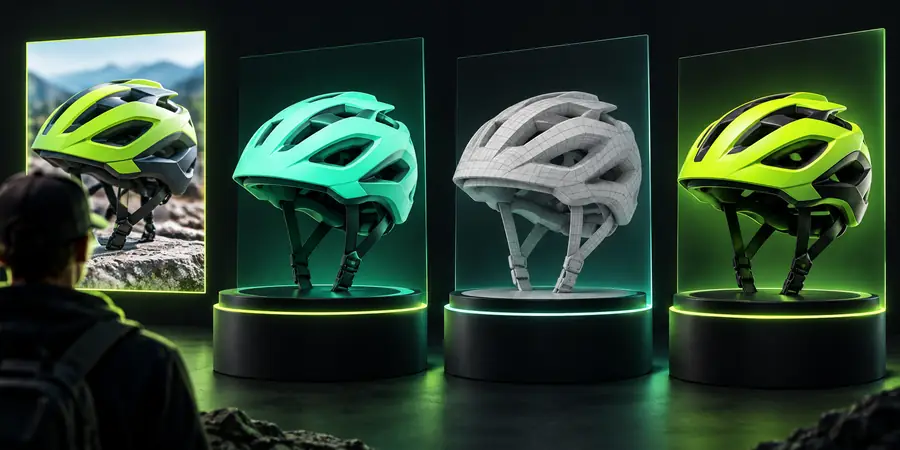
If the model looks flat, add or reshape its side-view volume instead of adding surface detail. If it looks stretched, revisit reference alignment and proportions. Dark or inconsistent shading can indicate reversed normals or overlapping faces; inspect the mesh before changing materials. A single reference does not verify the back or underside, so label those areas as interpretations rather than exact reconstructions.
Visible referenceModeled interpretationAdvanced tips
Once the basic form works, collect side and rear views where possible, or sketch the missing views before refining the mesh. Use a Mirror modifier while shaping symmetrical subjects, but inspect the center seam and turn it off for genuinely asymmetric details. Keep an unmodified version before applying modifiers or making large topology changes. If you plan to texture the object, distinguish painted details in the picture from changes that belong in the geometry. When considering how to convert image to 3d model in blender for a complex subject, break it into separate major forms first; a photograph is a guide to visible proportions, not an automatic blueprint. You can also explore a separate 3D creation workflow, then evaluate any result against the same reference and side-view checks.
Turn a reference into a stronger starting point
- Check front, side, and perspective views
- Preserve a copy before major edits
- Treat unseen surfaces as design decisions
Tutorial FAQ
Not through the reference-image modeling steps in this guide. A picture can guide the visible shape, but it does not contain dependable information about hidden surfaces or thickness. You must model those areas, supply more views, or make informed design choices.
Use a clear image with an unobstructed subject and an outline you can identify easily. A front or side view with little perspective distortion is simpler to follow than a wide-angle photograph. Matching views of the same object help you estimate depth more consistently.
You may have matched the front silhouette without building enough depth. Switch to a side view and reshape the large volumes before adding details. Also check whether perspective in the photograph has made near parts appear larger than they really are.
Start with a plane when the subject has a simple outline that you intend to extrude. A cube or another primitive is often easier for an object with substantial volume. Either approach works if you keep checking the mesh from more than the reference view.
Inspect the mesh for missing faces, unwanted overlaps, reversed normals, and an unsuitable origin or scale. Save the Blender project before exporting so you can revise it later. Choose an export format based on the receiving application's requirements, and verify materials or textures separately from the geometry.